
Allow me to make a bold statement.
Google Tag Manager is one of the best things that’s happened to data-driven marketing in years!
I’m fairly new to analytics-centric marketing (been doing it for just over 18 months) and I have been told over and over that if it can’t measure it, then you can’t manage it. Google Tag Manager will help you to get clean and credible data – whether in your Google Analytics account or other third-party analytics services.
There are a number of reasons why we love Google Tag Manager and these 5 pretty much summarize why we encourage marketers (like you!) to use it.
1. Less Dependence On Developers To Fire Tracking Scripts
BGTM (Before Google Tag Manager), when we wanted to put a tracking script on specific web pages of our client’s website, we would need to get in touch with their developer, send them the script we wanted to fire, give instructions on how to do it, wait for their confirmation that the script had been installed and, finally, verify on our end that it’s actually reporting what we wanted it to..
This process could sometimes take several days. If you have an in-house developer, the process might be shorter. If you manage the backend of your website yourself, then I guess that process could be a little more streamlined.
But wouldn’t it be better if there was an easier way to do it?
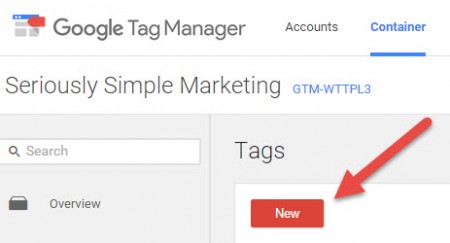
Here’s an example, let’s say I want to fire Hotjar’s scripts on my entire site (in case you’re wondering, Hotjar is a great heatmapping and session recording tool that we use). Instead of doing it the long way like I described above, I can do it in Google Tag Manager with 4 simple steps:
Step 1: Create a new tag and name it
![]()
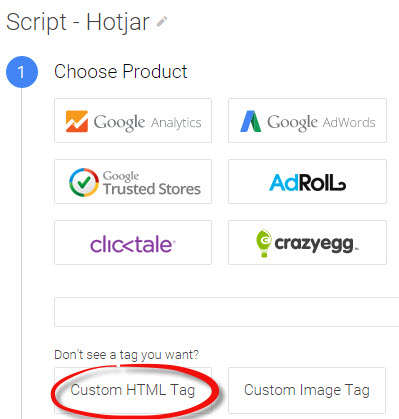
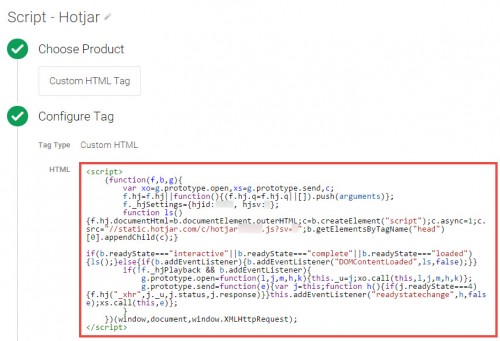
Step 2: Select custom HTML & paste in your script
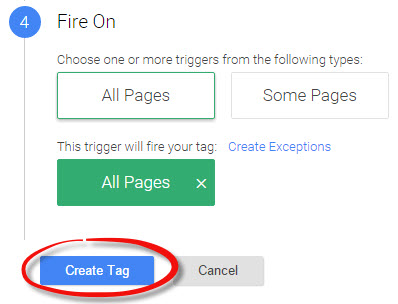
Step 3: Tell Google Tag Manager when you want it to “fire” your tag. (In this case, we will fire the script on All Pages.)

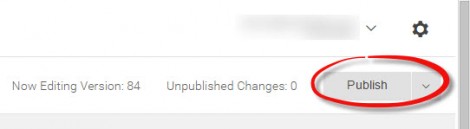
Step 4: Create your tag and publish!
Once you get the hang of it, it will take you only a minute or two to set something like this up. It beats waiting for hours or days for your web developer to do it.
2. Set Up On-Click Events Easily
Using events is one of the best ways to track how users are interacting with your website. More specifically, “on-click events” are a great way to identify what links or buttons your users are clicking. This is especially useful if you have several call-to-action buttons or links that are present in a single page.
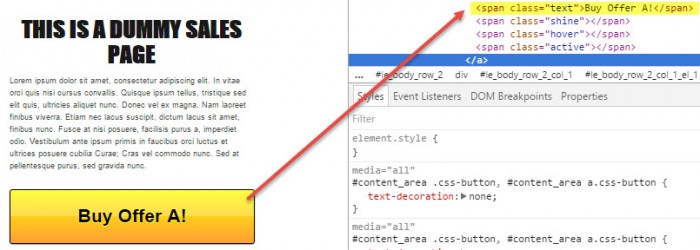
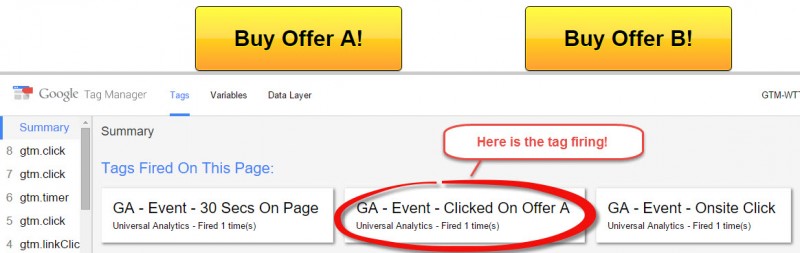
Take this dummy page as an example:

Setting up on-click events is the best way to know whether users are clicking on Offer A or Offer B (especially if both pages lead to an order form with the same URL).
If we were to do this the pre-GTM way, we would have needed to create on-click codes for each click event. Then we need to give these to a developer so they could hardcode them to each button.. Again, this process can take several days.
With Google Tag Manager, days are cut down to minutes. Here’s how you can easily set up events in Google Tag Manager:
Step 1: Right click on the button you want to fire an on-click event for and choose “Inspect Element.”
Step 2: Look for the element id, element class, element url, etc. Take note of this information because you will use this in creating your trigger later. In this example, we use the Element ID.
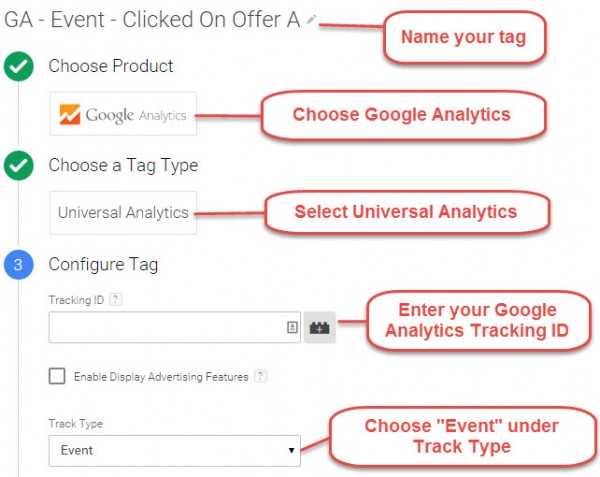
Step 3: In Google Tag Manager, create a new tag. Choose Universal Analytics, enter your UA Tracking ID in the Tracking ID Field and select “Event” as the track type.
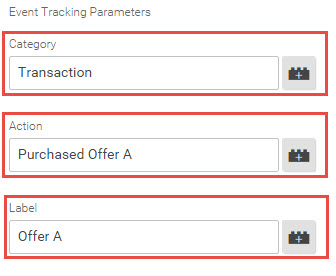
Step 4: Enter labels for your Category, Action, and Label. Make sure you name these in a way that would make sense to you. In this example, we will use “Transaction”, “Purchased Offer A”, and “Offer A” respectively.
5. Create your firing rule using one of the Element properties.
Remember the Element ID we took note of earlier. We will use that to create the firing rule for our event tag. Here are the steps to create that trigger:
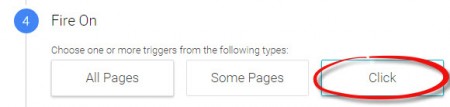
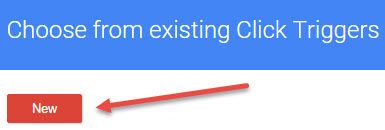
Step 1: Under “Fire On,” select “Click” and select “New” on the popup
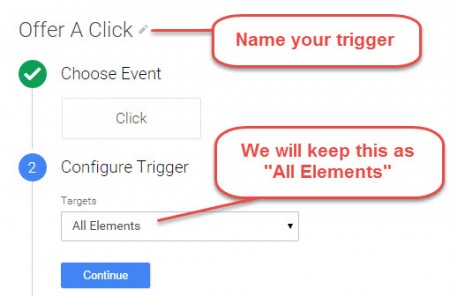
Step 2: Name your trigger. Under “Choose Event,” “Click” will already be pre-selected. In this case, we will select “All Elements” under Configure Trigger>Targets
Step 3: Under “Fire On”, we will select Some Clicks because we want this to fire only when the Offer A Button is clicked

Step 4: From the dropdown, we will select Element ID because that’s the element property we took note of earlier. We will choose “Contains” as the condition and paste the Element ID we copied earlier

Step 5: Click on Create Trigger. Create the tag and publish your container
This will take you roughly 10-15 minutes to setup, probably a little longer if you’re just learning Google Tag Manager. Either way, this is still much quicker and a whole lot more efficient compared to working with a developer.
EXTRA HOT TIP!
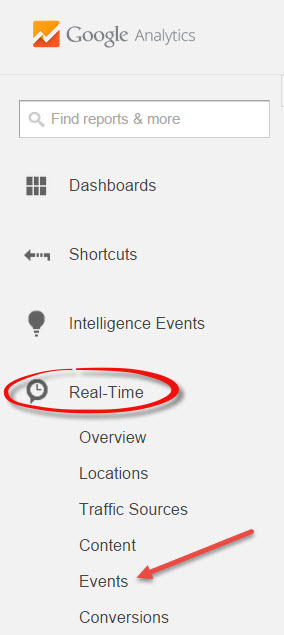
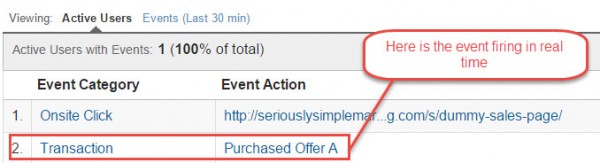
To verify that the on-click events are reporting in Google Analytics, you can go to Real-Time Reports and then click on Events. If your events are reporting, you will see your Event Category/Event Action Reporting once you click on that button or link you’ve setup.
3. Keep Third-Party Marketing Pixels Under One Roof
If you’re spending money on AdWords, Bing, Facebook, or any other advertising platform, you’re probably hardcoding a lot of marketing and conversions pixels on your website. Soon, your website will be cluttered with tons of retargeting and conversion pixels,(many of which you probably no longer need), but may still be firing and possibly messing up your numbers.
With Google Tag Manager, you can fire all your pixels under one roof. There’s even built-in tracking for AdWords! Once you’re no longer running an advertising campaign, you can easily deactivate or delete the pixel for that finished campaign.
With Google Tag Manager, you can see everything in one place so it’s easier to keep inventory of your marketing pixels and manage everything in one spot. You can easily disconnect pixels that are no longer used and easily add new ones whenever the need arises!

4. Creative and Flexible Tracking
A lot of times, we deal with complicated funnels.By complicated we mean…
- Tracking different opt-ins that lead to the same Thank You Page.
- Tracking users from different landing pages that go through the same core funnel pages.
- Tracking a selection from an upsell page that goes to a third-party cart (that we can’t track in Google Analytics) then goes back to a hosted thank you page.
- And countless other combinations…
Before, tracking these things would have been a pain in the butt, if not impossible!. Worse yet, even if it were possible, it would require days to set up complicated scripts that only advanced developers would know how to implement.
With Google Tag Manager, there are a number of creative and flexible tracking options you can take advantage of. Here are two of our favorites.
First is by using what’s called a Data Layer. A data layer is basically a virtual filing cabinet where you can put any and all information you want. For example, if I have numerous optin pages that go to the same Thank You Page, I can setup a data layer to report on which page the user originally opted in. I can then setup an event in Google Tag Manager that will fire when the data layer contains this information. This event, in turn, will then fire a goal in Google Analytics.
Our second favorite option is by using a cookie. For example, I have an upsell page that has numerous offers, but it goes to a third-party cart or order form, which we can’t put Google Analytics and Google Tag Manager code on. Basically, we lose tracking on this page. So how do we determine which product they selected on the upsell page? We can drop a cookie when they clicked on an offer in the upsell page. This cookie is stored during the session. When they hit the third-party cart, the user is still cookied and when they hit the next page hosted on my site, Google Tag Manager will be able to read that cookie and associate it with a button click on my upsell page, telling me which offer they selected.
I know that these are a bit more advanced, but once you get to the point when you’re tracking complicated funnels, Google Tag Manager willdefinitely make your life easier.
5. Preview And Debug Your Tags Before Publishing
Before Google Tag Manager, when pixels or events or scripts are not firing, we had to go back and forth with developers to troubleshoot what the problem was. It could take several days and there have been a lot of times where we lost a good amount of data because of this.
Google Tag Manager has a feature called “Preview” which you can use to verify that your tags are firing when you want them to fire. It basically allows you to debug your tags in real time and see how everything reports. . If you enter preview mode, a debug console will show as you are browsing your web pages.
For example, I have an event tag that should fire on click of Button A. In debug, I can see if the tag will fire when I click that button.
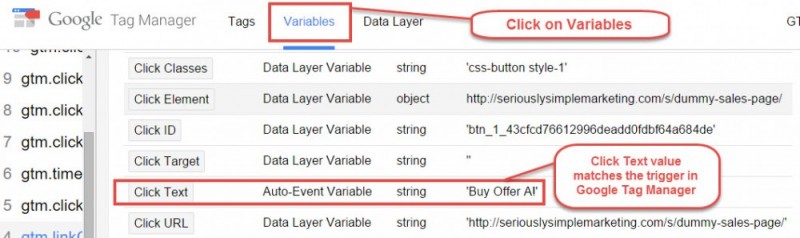
If it doesn’t, I can actually check how Google Tag Manager is reading the “Element ID” when I click the button and make sure that it’s the same with the value that I specified for the tag to fire.
Ever since we started using Google Tag Manager, tracking sales funnels has been much easier and we’re able to find creative solutions to track things that were extremely challenging to track in the past.
In Summary…
I won’t sugarcoat things and say that you can be a Google Tag Manager expert overnight. We haven’t used it to its full potential yet – we still have questions and still learning things along the way! (By the way, there is a great Google Tag Manager Google+ Community where we post our questions for things we don’t know and it has been extremely helpful). But the time you spend learning the ropes of Google Tag Manager will definitely be worth it in the end.
Have you started using Google Tag Manager yet? What are your thoughts? I’m happy to answer any questions you have (just leave them in the comments below). If you think this post might be helpful to a friend or colleague, please tag them and share!
– Darwin