Google Analytics out of the box is great. But to really unlock the power of analytics, you have to customize it–start with setting up some basic goals. One of those types of goals is called a “destination goal.” Which is really just a fancy way of saying, “Hey Google Analytics, please let me know when someone loads up a particular page on my site.”
Where To Start…
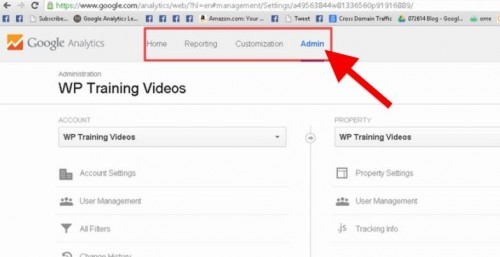
First, click on the main navigation bar at the top of the page and click ADMIN.
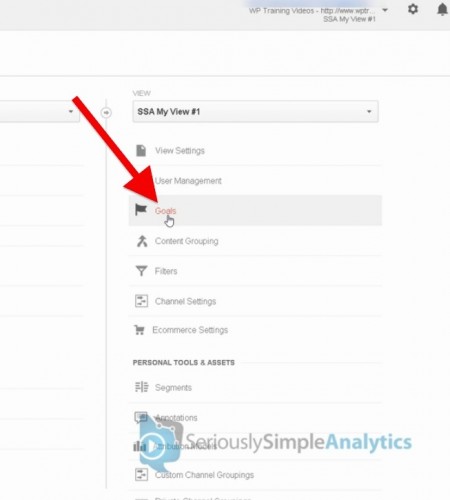
Next, you click on GOALS.
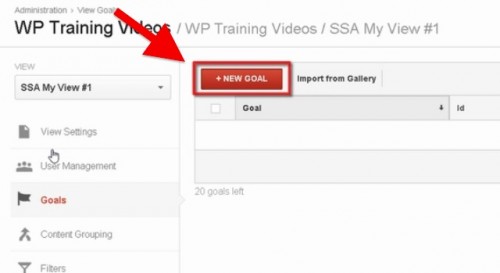
You should now find yourself on this page. Click on NEW GOAL.
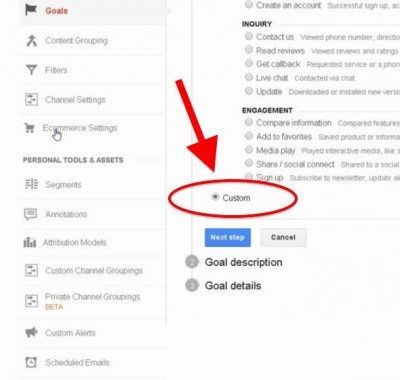
Scroll down and you will find a CUSTOM option. Select custom and click NEXT STEP.
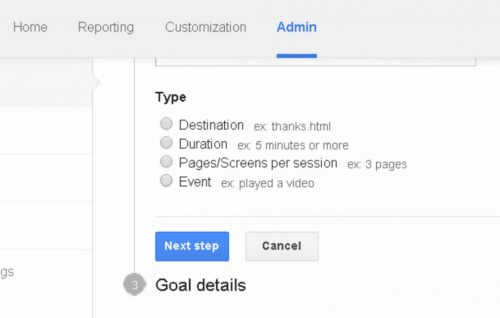
You will now see all the types of goals that you can create.
Setting Up Destination Goals In Google Analytics
STEP 1: Select the type of goal you want to set up. In this case, click on DESTINATION.
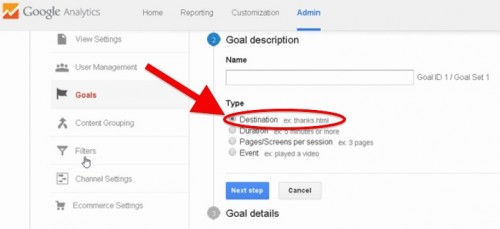
STEP 2: Decide on what goal you’re trying to track.
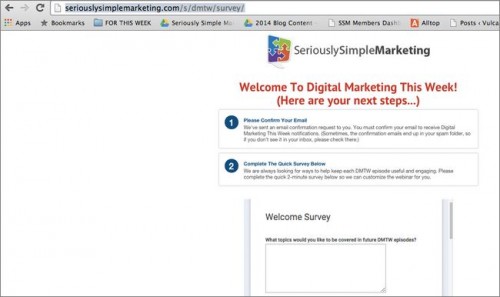
For the purpose of this post, we’ll show you how we can track our DMTW (Digital Marketing This Week) optin form, with the goal of figuring out the number of people who sign in.
We do this by tracking how many people are visiting the THANK YOU page that someone goes to after opting in. The image below shows a screenshot of that page… the important part is the URL that's in the browser (the part highlighted in gray in this image).
Type in a title for the goal…
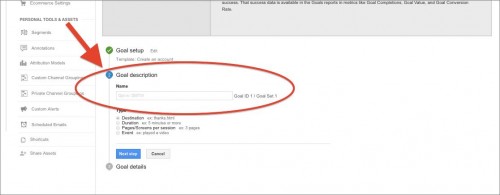
You can type in and label it whatever you want, but it helps if you title it as an action so that’s it’s easy to keep track of it. If the goal is to track how many users opted in for DMTW, which ends with our survey, then something like “Opt-in: DMTW” would make the goal easy to remember.

STEP 3: Click on NEXT STEP and begin actual set up
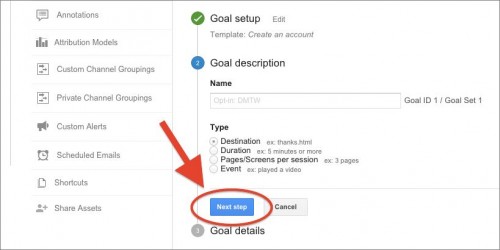
You will find yourself here…
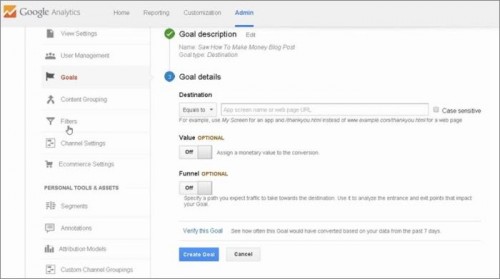
Click on GOAL DETAILS, This is the part where you'll tell Google Analytics when it's supposed to trigger the goal.

You have 3 options:
- “Equals to” means the goal will only fire when the URL exactly matches what you type
- “Begins with” means it has to begin with what you enter, but doesn’t necessarily have to end with that, which is useful for affiliate links or UTM tracking codes.
- “Regular expression” is a little more advanced. Basically you can create a formula that will filter out certain pages from others. If you're new to Google Analytics, you'll just want to skip using RegEx for now. 🙂
In our example, we'll go with the “Begins with” option…
We copy the URL of the page you want to track…
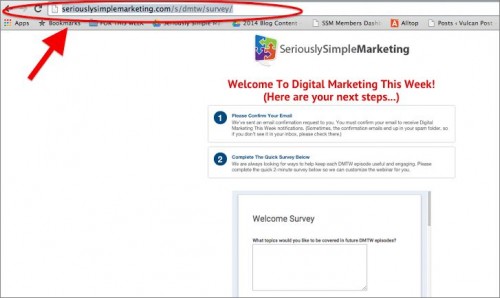
…and paste it in the goal details section.

NOTE: We enter the “seriouslysimplemarketing.com/s/dmtw/survey” because we have customized our Google Analytics to show the entire URL. If this were a basic setup, we would just enter “/s/dmtw/survey” (and not use the domain name in the URL.
Let’s say this particular page earns money every time it gets viewed, you can click on VALUE and assign a value.
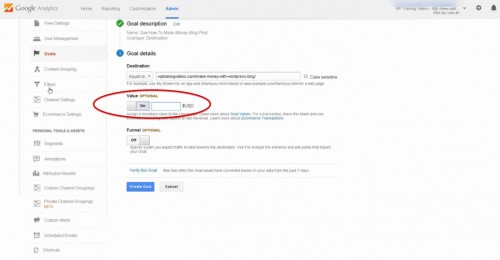
You also have the option to set up FUNNEL tracking, but since this is just a simple optin goal, we don't have a funnel to track.
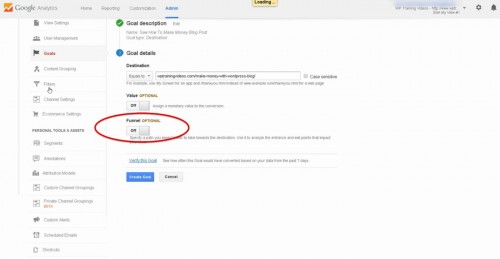
STEP 5: Verify the goal
Simply click on VERIFY…
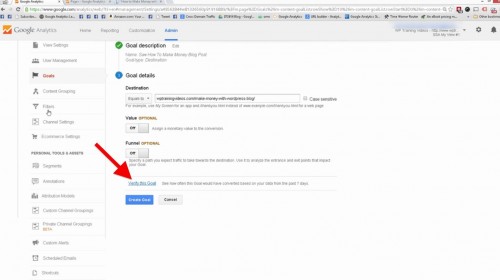
This shows you how much traffic would’ve triggered this goal in 7 days. Keep in mind, if you've just created the page your are trying to setup the destination goal for, it wouldn't have any traffic yet (since it's a new page). In this case, the “verify” feature won't be useful to you. Instead just skip to the “create goal” button to finalize your goal and then check it by testing it out while you are looking at your Realtime>Conversions reports.
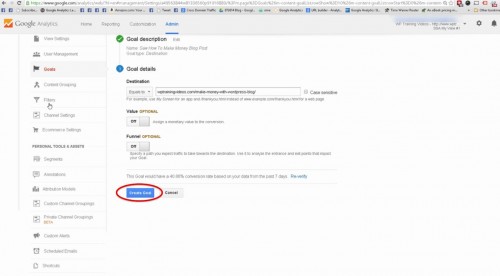
There you have it!
If you have questions about this, just leave me a message in the comment section and I will make sure to get back to you with an answer.
If you found this post useful and know of others who would benefit from this particular post about setting up destination goals on Google Analytics, be sure to hit those share buttons.
– Mercer


